Searching for how to add a delivery date on the cart page in Shopify? You need customers to choose a day before checkout — not leave a vague note that your packing desk has to decode later.
This guide shows how to add a delivery date picker to your cart the modern way (theme app block), when the old Liquid edit still appears in older tutorials, and how to finish the setup with blocked days, cutoffs, time slots, and a required-date rule. The walkthrough uses Order Delivery Date Lite, a cart calendar built for florists, bakeries, grocery, pharmacies, and other local stores.
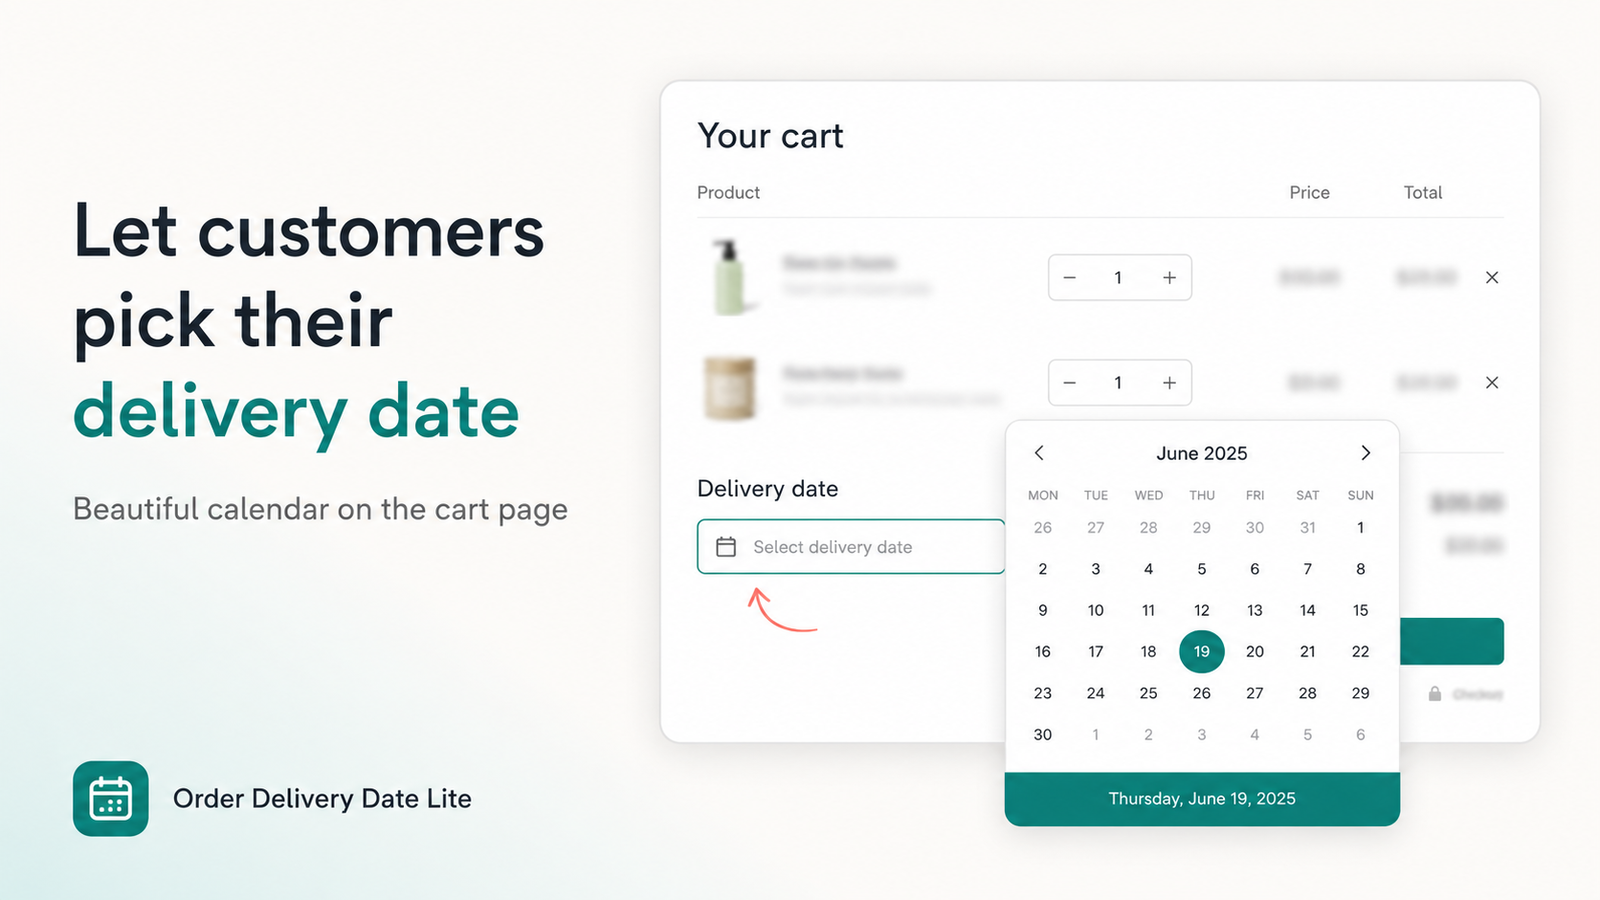
Why put the delivery date picker on the cart page?
The cart is the last place customers still see line items and can change their mind. Asking for a delivery date there means:
- Every order gets a date — saved as order attributes / notes your team can filter on.
- Fewer “when do you want this?” emails after payment.
- Works on all Shopify plans — you do not need Shopify Plus just to show a cart calendar.
- Pairs with shipping methods — local delivery, pickup, or standard shipping can still use the same scheduling layer.
Checkout-only calendars are useful on Plus stores, but most merchants start on the cart because it is available, visible, and easy to test.
Quick answer: Install a delivery date app → activate cart settings → enable the theme app embed or cart block → set blocked weekdays and holidays → make the date required → place a test order.
Recommended: add a delivery date picker with an app (no Liquid edit)
Online Store 2.0 themes support theme app extensions. That means you can place the calendar on the cart template from the theme editor — no hunting for main-cart-items.liquid or the closing </form> tag.
1. Install Order Delivery Date Lite
- Open the Order Delivery Date Lite listing on the Shopify App Store.
- Install on your store (Free on development stores; Basic $4.99/mo and Pro $9.99/mo with a 7-day trial).
- Open the app from Shopify admin → Apps.
2. Activate the cart calendar
- Go to Settings → Cart in the app.
- Set Status to Active (the app installs deactivated so nothing appears until you are ready).
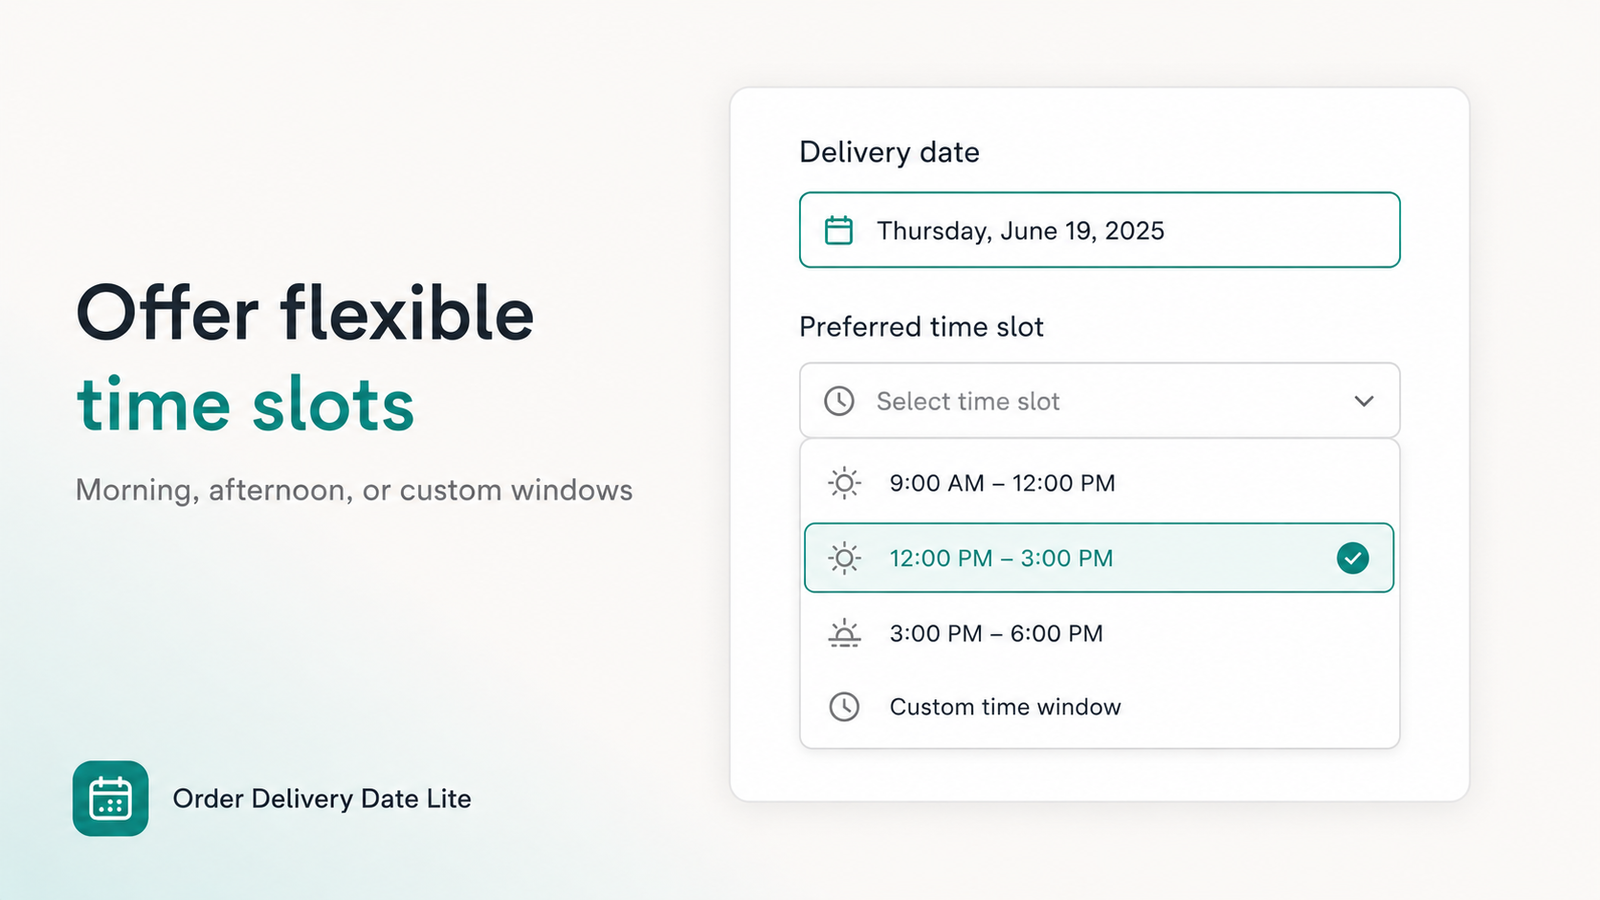
- Choose date format, first available day, and whether time slots are shown.
3. Enable the theme app embed or cart block
- In Shopify admin go to Online Store → Themes → Customize.
- Open the Cart template (or App embeds in the left sidebar, depending on your theme).
- Enable the Order Delivery Date Lite embed, or click Add block and place the delivery date block where you want it (above checkout is common).
- Save the theme.
Visit your live cart with a product added. You should see the calendar without editing any Liquid files.
Cart page Theme app block No code required4. Make the date required (recommended)
Under Settings → Cart, enable the required-date message so customers cannot check out without picking a day. Optionally require a time slot if you run van windows or kitchen batches.
Legacy method: paste a snippet in cart Liquid
Older Shopify Help and community posts still describe editing theme code — for example opening the Sections directory, clicking main-cart-items.liquid, and adding a delivery date snippet near the closing </form> tag.
That approach can still work on vintage themes, but it has real downsides:
- Theme updates overwrite custom Liquid unless you re-apply the snippet.
- File names differ by theme — Dawn uses
main-cart-items.liquid; other themes usecart-template.liquid,cart.liquid, or a section with a different name. - Cart drawers often ignore that form — ajax carts load a different template, so the snippet never appears.
- You still need JS and settings for blocked days, cutoffs, and validation — a bare date input is not a fulfillment system.
If a developer already left a wrapper <div> in your cart for an app, you can keep it. For new setups, prefer the theme editor block so the picker moves with your theme and survives updates.
| Approach | Best for | Risk |
|---|---|---|
| Theme app block / embed | OS 2.0 themes, most merchants | Low — reversible in the editor |
Liquid snippet before </form> |
Old themes without app blocks | Higher — breaks on theme update |
| Checkout calendar only | Shopify Plus stores | Needs Plus; cart still useful as backup |
Configure blocked days, cutoffs, and time slots
Showing a calendar is step one. Making it match how you actually deliver is step two.
Disable closed weekdays
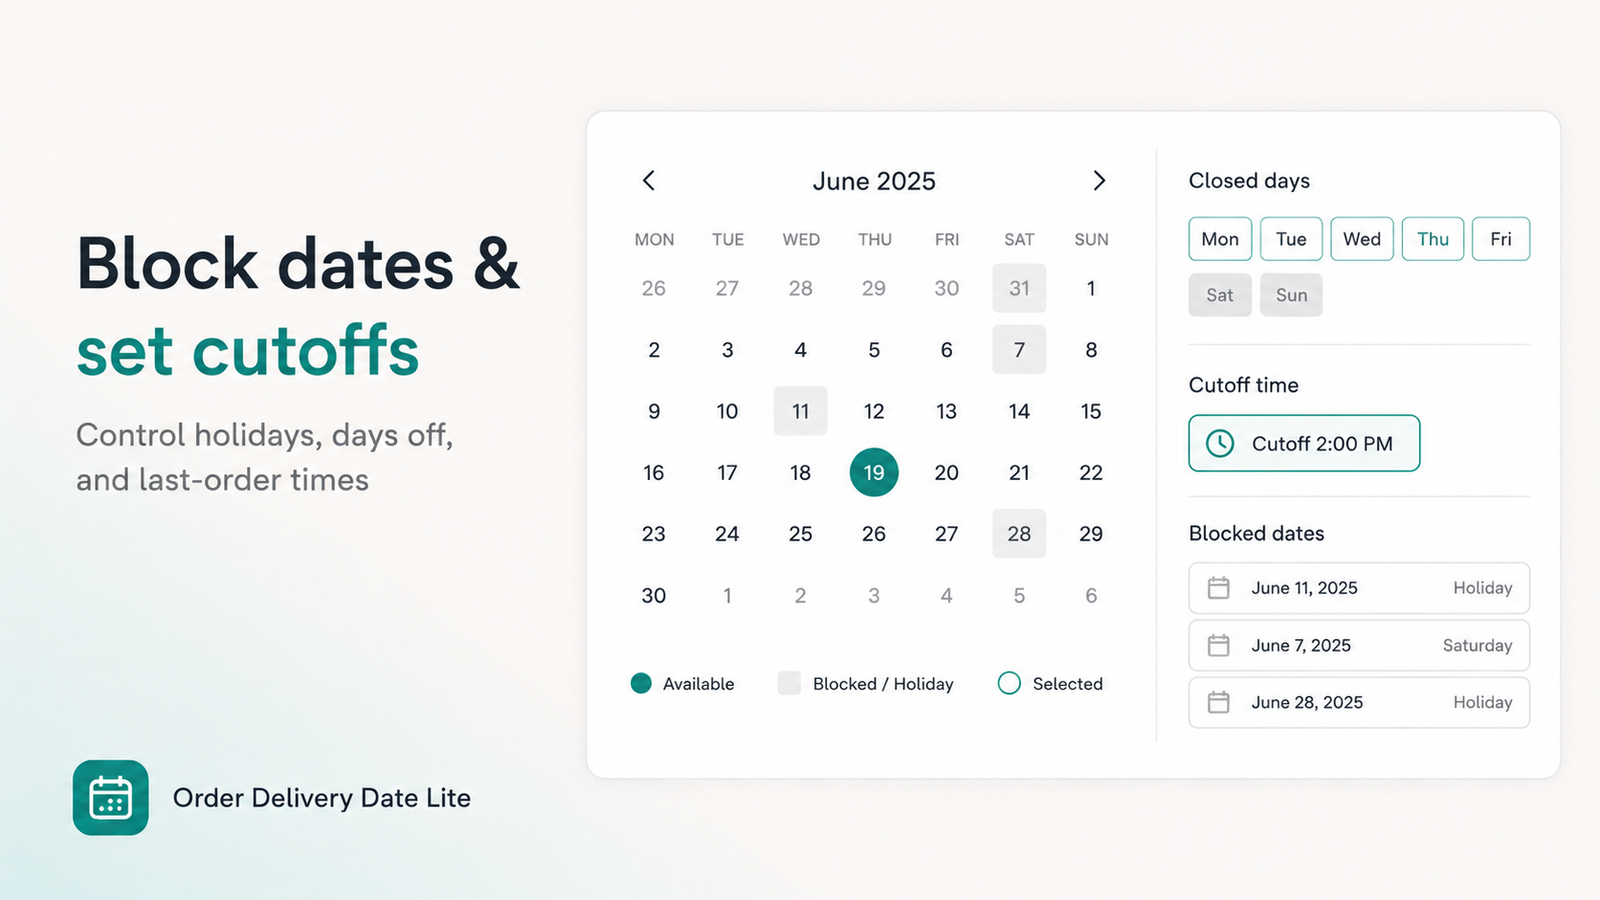
In Settings → Cart, turn off Sundays (or any day you do not deliver). Customers will only see open days on the picker.
Block holidays and capacity days
Use Blocked dates for Christmas, Valentine’s Day overflow, or any date the van is full. Those dates gray out on the calendar automatically.
Set a daily cutoff
If same-day orders must stop at 2:00 PM store time, set a cutoff so the picker advances to tomorrow after that hour. This alone prevents most “we can’t make it today” refunds.
Offer time slots (optional)
Morning / afternoon windows (or custom ranges per weekday) help batch routes. Food and florist stores almost always want slots; gift shops sometimes only need a date.
For local delivery zones in Shopify itself, pair this guide with Shopify Local Delivery setup. For food-specific capacity tips, see delivery date picker for food stores.
Cart drawers and mobile
Many Horizon, Dawn, and custom themes use a slide-out cart instead of a full cart page. In Order Delivery Date Lite:
- Enable cart drawer support under Settings → Cart.
- Add a product on mobile and open the drawer — confirm the calendar appears before the checkout button.
- If your drawer is heavily customized, use the theme app block on the cart page as a fallback and link “View cart” clearly.
Go-live checklist
- App Status = Active on Cart.
- Theme app embed or cart block enabled and saved.
- Calendar visible on desktop cart and (if used) mobile drawer.
- Closed weekdays and holidays blocked.
- Cutoff time matches your kitchen / van schedule.
- Required date (and optional time) enabled.
- Place a test order — confirm the delivery date appears on the order in Shopify admin.
- Optional (Plus): enable checkout validation so customers cannot skip the date at checkout.
Where does the date show for your team? On the order page in Shopify admin (attributes / notes), and optionally on the Thank You page via the app’s thank-you block — do not rely on deprecated Additional Scripts.
Frequently Asked Questions
How do I add a delivery date picker to the Shopify cart page?
Install Order Delivery Date Lite, set Cart status to Active, then enable the theme app embed or add the cart block in the theme editor. Customers pick a date before checkout; the selection is saved on the order.
Do I need to edit main-cart-items.liquid?
Usually no. Older tutorials paste a snippet before the closing form tag. On Online Store 2.0 themes, a theme app extension is safer and survives theme updates.
Can the delivery date appear in a cart drawer?
Yes. Enable cart drawer support in the app and test on mobile. If a custom ajax cart still hides the picker, keep the full cart page as a fallback.
How do I make selecting a delivery date required?
Use Settings → Cart for required date/time messages. On Shopify Plus, also link the checkout validation function under Checkout rules for a second check.
What is the best free way to try this?
Order Delivery Date Lite is free on development stores. Paid stores get a 7-day trial on Basic ($4.99/mo) or Pro ($9.99/mo).
Add a delivery date picker to your cart today
Cart calendar, blocked days, cutoffs, and time slots — live in minutes without editing theme Liquid.
Install Order Delivery Date Lite →